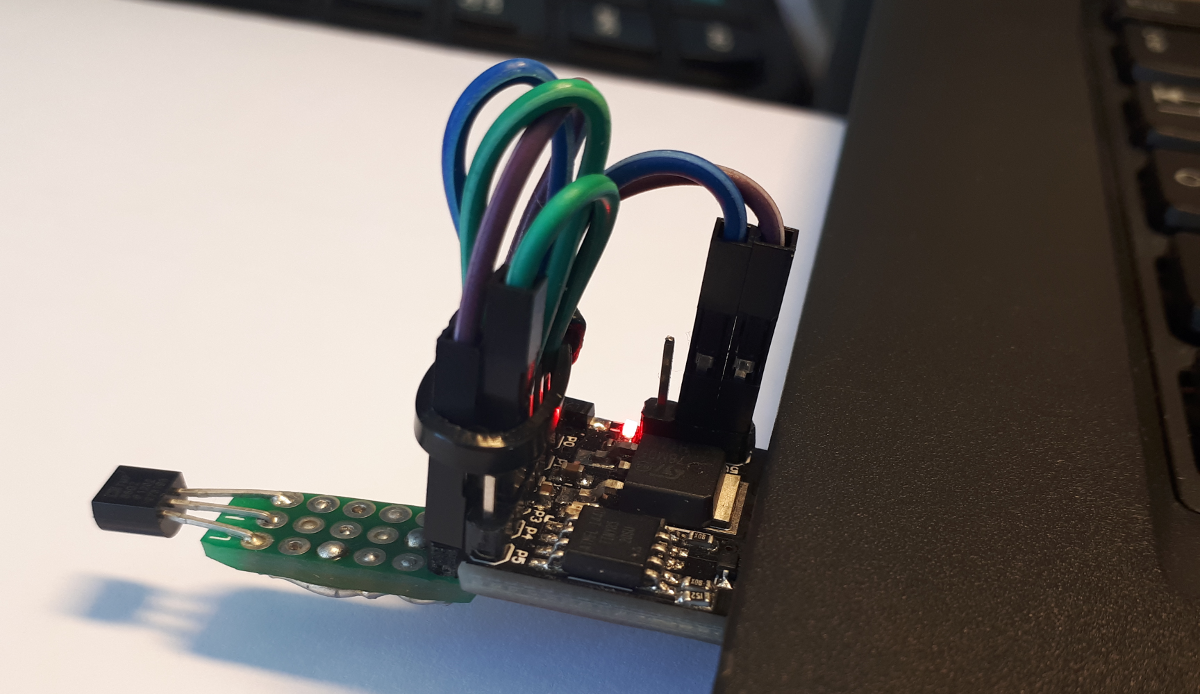
Serial analog sensor
This blog post is about building a super simple analog sensor for Home Assistant. The physical sensor will send the data over its virtual serial port as it will be connected over USB. The concept is similar to the TEMPer USB devices. The attatched sensor type to the microcontroller can be any kind of sensor which gives you an analog signal from brightness over soil moisture to temperature.
The microcontroller will only transfer the voltage of an analog input pin which will be between 0 and 1024. Home Assistant will use the new serial sensor platform to read the data and perform actions to convert the raw reading into a real measurement. This means that you don’t have to adjust the code of your microcontroller if you change the attached sensor type.
 The assembled sensor
All parts needed in this how-to can be bought for less than 2 Euro or 2 USD from China. I’m going to use the following items which were already available in my craft crate:
- Digispark USB Development Board
- Temperature sensor TMP36 (or any other sensor that gives you an analog signal)
- Cables (if you don’t want to connect the sensor directly to the board)
The cabling is easy.
| Sensor | Digispark |
|---|---|
| GND | GND |
| VCC | 5V |
| VOUT | P4 |
There are other boards with the same size available. Like those with the far more powerful Mega32U4 chip. However, it would work with boards from the Arduino family as well if you adjust the code provided below.
The sketch is pretty simple. We are going to send the readings to a virtual serial output every 5 seconds. No logic needed. A little plus is that the onboard LED is blinking as an indicator that the board is working. Upload the code to your Digispark board. Keep in mind that the upload process is different than with Arduino or ESP8266 boards.
#include <DigiCDC.h>

#define LED_PIN 1
#define INPUT_PIN 2  // Physical pin P4 is analog input 2

void setup() {
  SerialUSB.begin();
  pinMode(LED_PIN, OUTPUT);
}

void loop() {
  if (SerialUSB.available()) {
    digitalWrite(LED_PIN, HIGH);
    SerialUSB.delay(250);

    int reading = analogRead(INPUT_PIN);
    SerialUSB.println(reading);

    digitalWrite(LED_PIN, LOW);
    SerialUSB.delay(5000);
  }
}
To make it work with other boards simply use Serial.begin(115200); and Serial.println(reading);.
If you connect with a tool like minicom to your system’s serial port /dev/ttyACM0, then you will get the data. To use the sensor with Home Assistant the serial sensor platform needs to be set up.
sensor:
  - platform: serial
    port: /dev/ttyACM0
The physical sensor reads the current voltage of the pin. A template sensor takes the reading and converts it into a measurement. The data sheet of the sensor unit usually contains details about the involved calculations.
  - platform: template
    sensors:
      temperature:
        friendly_name: Temperature
        unit_of_measurement: "°C"
        value_template: "{{ (((states('sensor.serial_sensor') | float * 5 / 1024 ) - 0.5) * 100) | round(1) }}"
Hide the serial sensor if you don’t want to see the raw data in the frontend and you are done. The whole setup with a Digispark is not very reliable because there is no hardware USB support. As a showcase and if you don’t build your automation rules around it does the sensor what it should for a very small price.